Microsoft Windows was forever about flexibility and about the fact that it doesn’t restrict you from doing anything. If you are upset because of the updates, you can simply pause them, close them completely or even schedule them.
Most of the people opt for the scheduling method, just because it gives them a structure and they can plan ahead how their day will unfold.
If you’re interested in winning yourself more time by scheduling the Windows Updates, continue reading this article!
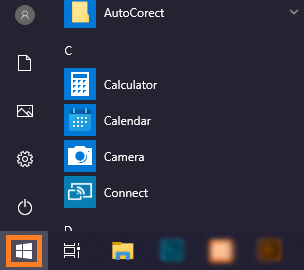
Step 1:
Press the Start menu button, which can be found in the bottom left corner, and press on the Windows logo:
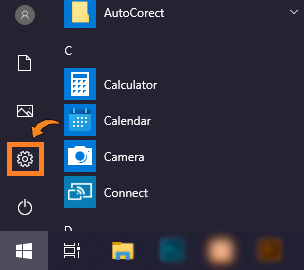
Step 2:
Press on the Settings button:
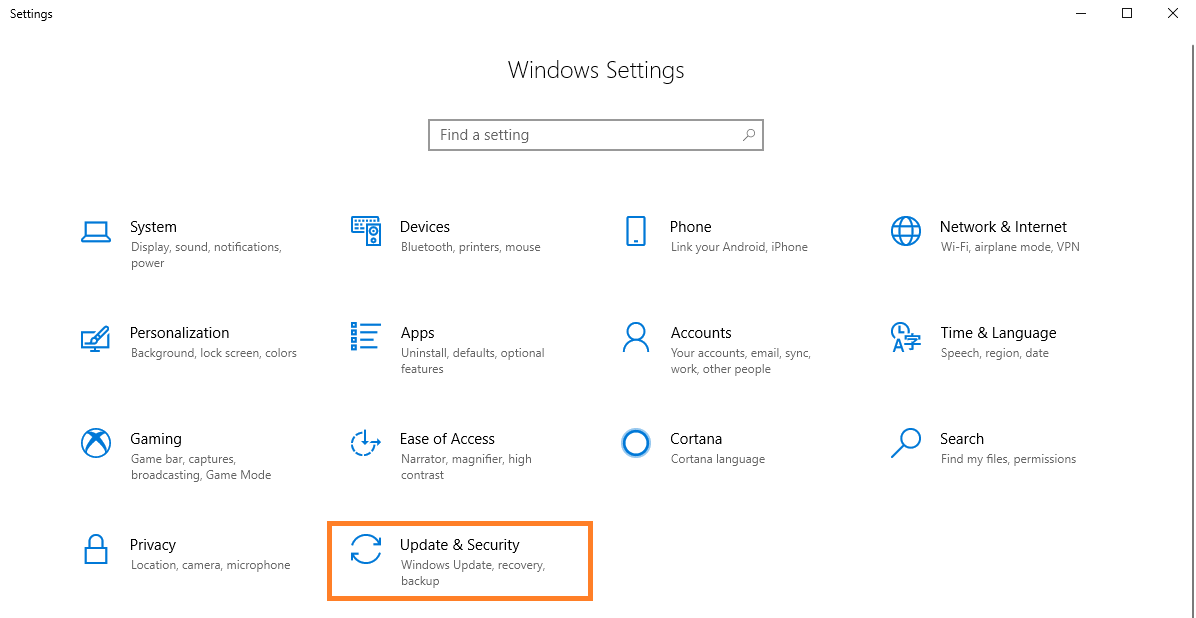
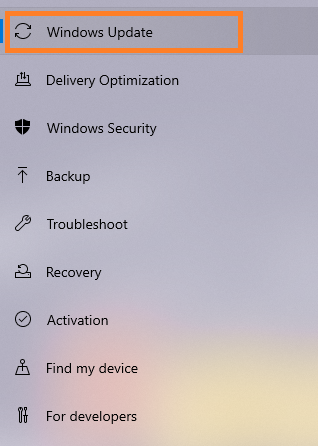
Step 3:
Navigate to Update & Security > Windows Update:
Step 4:
Now, select either Pause updates for 7 days or Advanced options.
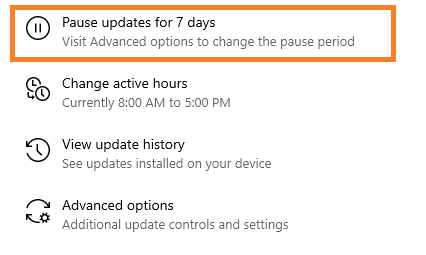
Pause updates for 7 days, if pressed, will automatically add seven days schedule to the computer, meaning that, in the next seven calendarists days, the computer will not receive any updates. There is a limit of 35 days (this limit can also be reached if the Pause updates for 7 days is pressed 5 times).
In the Advanced options menu, there can be selected a convenient day, so the computer will not receive any updates, until the selected date.
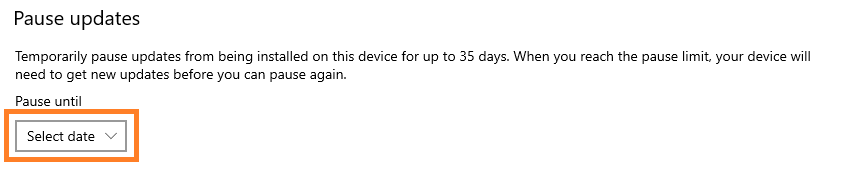
Remind: IF the pause limit is reached, your device will need to get the NEW UPDATES before you can pause the updates again.
If you got confused in the steps explained or you found them difficult, you can contact a tech expert, and he can solve your problem immediately! We promise we solve your tech problem!
You can get expert support in just a minute!